Transforming your living space doesn’t have to drain your bank account. Budget-friendly DIY home improvement hacks offer an excellent way to enhance your home’s aesthetics and functionality without breaking the bank. These creative solutions not only save money but also allow you to infuse your personal style into your living space. By embracing these affordable DIY projects, you can breathe new life into your home, boost its value, and create a more comfortable environment for you and your family.
Refresh Your Walls
The walls of your home serve as a canvas for personal expression and can dramatically impact the overall ambiance of a room. Updating your walls is one of the quickest and most cost-effective ways to transform your living space. With a little creativity and elbow grease, you can give your rooms a fresh, new look without spending a fortune.
DIY Painted Accent Walls
Creating a bold accent wall using paint is an affordable way to add depth and character to any room. Here are some color ideas and techniques for different spaces:
- Living Room: Deep navy blue for a sophisticated look
- Bedroom: Soft sage green for a calming atmosphere
- Home Office: Vibrant yellow for an energizing workspace
- Kitchen: Warm terracotta for a cozy feel
- Bathroom: Light aqua for a spa-like ambiance
Techniques to try:
- Ombre effect: Gradually blend two or more colors
- Geometric patterns: Use painter’s tape to create bold shapes
- Textured finish: Apply paint with a sponge or rag for added dimension
Peel-and-Stick Wallpaper
Peel-and-stick wallpaper offers a quick and easy way to transform your walls without the commitment of traditional wallpaper. It’s perfect for renters or those who like to change their decor frequently.
| Material Type | Cost Range (per sq ft) | Durability | Ease of Installation |
|---|---|---|---|
| Vinyl | $1 – $3 | High | Easy |
| Fabric | $2 – $5 | Medium | Moderate |
| Paper | $0.50 – $2 | Low | Easy |
| Metallic | $3 – $7 | Medium | Moderate |
Benefits of peel-and-stick wallpaper:
- Easy to install and remove
- Wide variety of patterns and designs available
- No need for professional installation
- Can be used on furniture and other surfaces for added versatility
Transform Your Flooring
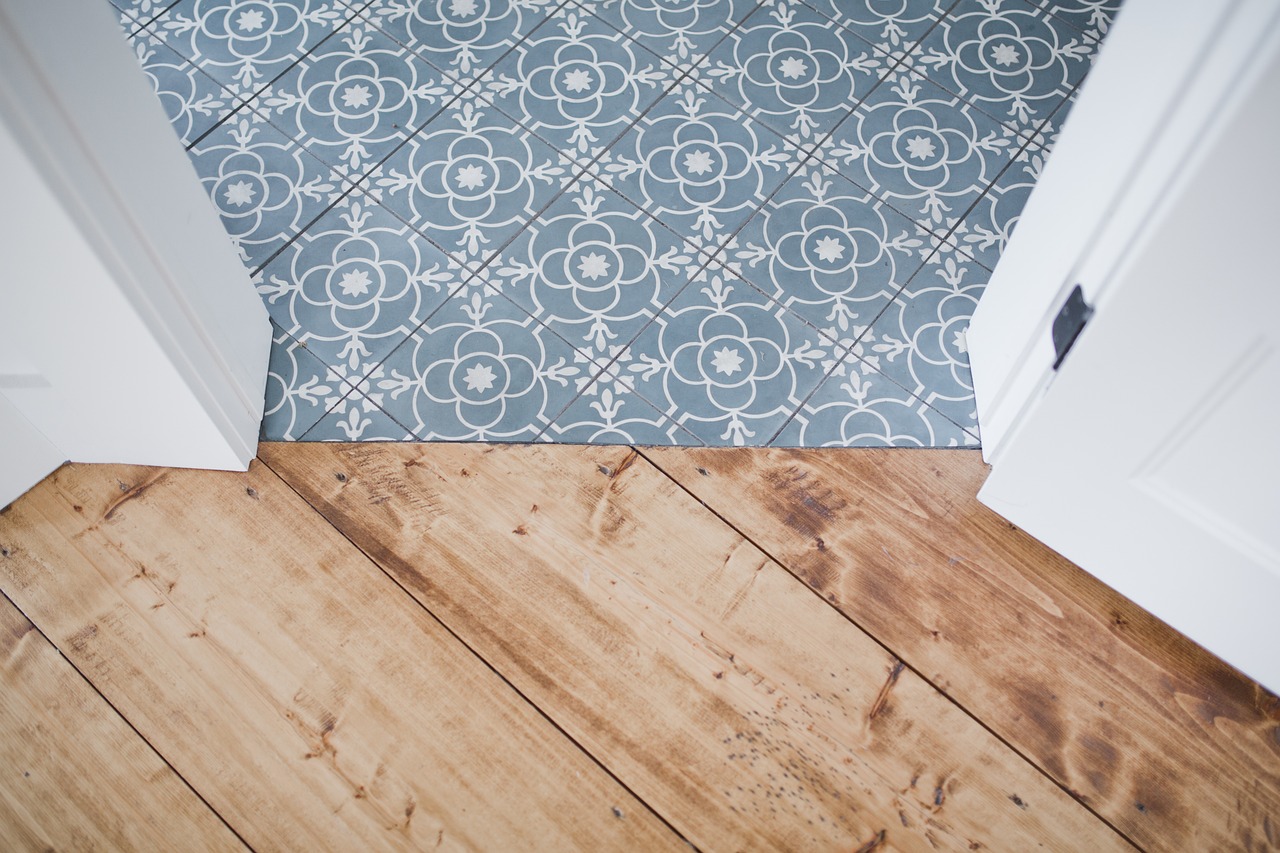
Flooring plays a crucial role in defining the character of a room. Upgrading your floors can dramatically change the look and feel of your space without requiring a significant investment. These budget-friendly flooring hacks can help you achieve a high-end look at a fraction of the cost of traditional flooring options.
Peel-and-Stick Floor Tiles
Peel-and-stick floor tiles offer an affordable and easy-to-install option for updating your flooring. They’re perfect for kitchens, bathrooms, or even creating a faux rug effect in living areas.
Step-by-step installation guide:
- Clean the existing floor thoroughly
- Measure and mark the center of the room
- Start laying tiles from the center, working your way out
- Cut tiles as needed to fit around edges and obstacles
- Press down firmly to ensure proper adhesion
- Use a rolling pin to secure the tiles further
- Allow the adhesive to set for 24-48 hours before heavy use
Tools needed:
- Measuring tape
- Chalk line or pencil
- Utility knife
- Straight edge
- Rolling pin
DIY Area Rugs
Creating custom area rugs is an excellent way to add warmth and style to your space on a budget. Here are some creative ideas for different areas:
- Living Room: Combine multiple small rugs to create a larger, patchwork effect
- Bedroom: Paint a bold pattern on a plain, inexpensive rug
- Dining Room: Use carpet tiles to create a custom-sized rug under the table
- Entryway: Stencil a design onto a solid-color rug for a personalized touch
- Outdoor Space: Repurpose an indoor rug with weatherproof paint for patio use
Tips for creating DIY area rugs:
- Use carpet binding tape to finish the edges of carpet remnants
- Experiment with layering rugs for added texture and interest
- Consider using outdoor fabric for high-traffic areas for increased durability
Affordable Kitchen Upgrades
The kitchen is often considered the heart of the home, and upgrading this space can significantly impact your daily life and your home’s value. Fortunately, there are several high-impact, low-cost updates you can make to refresh your kitchen without a full renovation.
Install a Backsplash
Adding a backsplash is an excellent way to protect your walls and add visual interest to your kitchen. Here’s a comparison of budget-friendly backsplash options:
| Material | Cost (per sq ft) | Durability | Ease of Installation |
|---|---|---|---|
| Peel-and-stick tiles | $5 – $15 | Medium | Very Easy |
| Beadboard | $0.50 – $1 | High | Moderate |
| Smart tiles | $8 – $20 | High | Easy |
| Painted stencils | $0.50 – $2 | Low | Easy |
| Tin ceiling tiles | $5 – $10 | High | Moderate |
Installation tips:
- Ensure the wall surface is clean and smooth before installation
- Use a level to ensure straight lines
- For peel-and-stick options, start from the bottom and work your way up
- Consider using a grout pen to add authenticity to peel-and-stick tiles
Cabinet Makeovers
Repainting or refinishing cabinets can dramatically change the look of your kitchen without the cost of replacement. Here’s a step-by-step guide:
- Remove cabinet doors and hardware
- Clean surfaces thoroughly with a degreaser
- Sand cabinets lightly to create a smooth surface
- Apply primer designed for cabinets
- Paint cabinets with your chosen color and finish
- Allow to dry completely before reattaching hardware
Paint types and finishes to consider:
- Chalk paint for a matte, vintage look
- Semi-gloss latex for easy cleaning
- Oil-based paint for durability in high-use kitchens
- Milk paint for an eco-friendly option
Enhance Lighting on a Budget
Lighting plays a crucial role in setting the mood and functionality of your home. Upgrading your lighting can dramatically improve the ambiance of your space without requiring a significant investment. These budget-friendly lighting hacks can help you create a warm, inviting atmosphere in any room.
DIY Light Fixtures
Creating or upgrading your own light fixtures is an excellent way to add a personal touch to your decor while saving money. Here are some creative DIY fixture ideas:
- Mason jar pendant lights: Perfect for a rustic or farmhouse-style kitchen
- Woven basket lampshade: Adds texture and warmth to any room
- Wine bottle chandelier: Ideal for a dining area or bar space
- Industrial pipe floor lamp: Great for a modern or loft-style living room
- Geometric wooden pendant: Adds a contemporary touch to bedrooms or offices
Tips for DIY light fixtures:
- Always ensure proper wiring and safety measures when working with electricity
- Use LED bulbs for energy efficiency and longevity
- Consider dimmer compatibility when selecting bulbs and fixtures
Install Dimmers
Installing dimmer switches is an affordable way to create ambiance and save energy. Here’s a step-by-step guide:
- Turn off power at the circuit breaker
- Remove the existing switch plate and switch
- Disconnect wires from the old switch
- Connect wires to the new dimmer switch according to manufacturer’s instructions
- Secure the dimmer switch to the electrical box
- Attach the new switch plate
- Restore power and test the dimmer
Tools needed:
- Screwdriver
- Wire stripper
- Voltage tester
- Needle-nose pliers
- Dimmer switch
Note: If you’re unsure about electrical work, consult a professional electrician.
DIY Storage Solutions
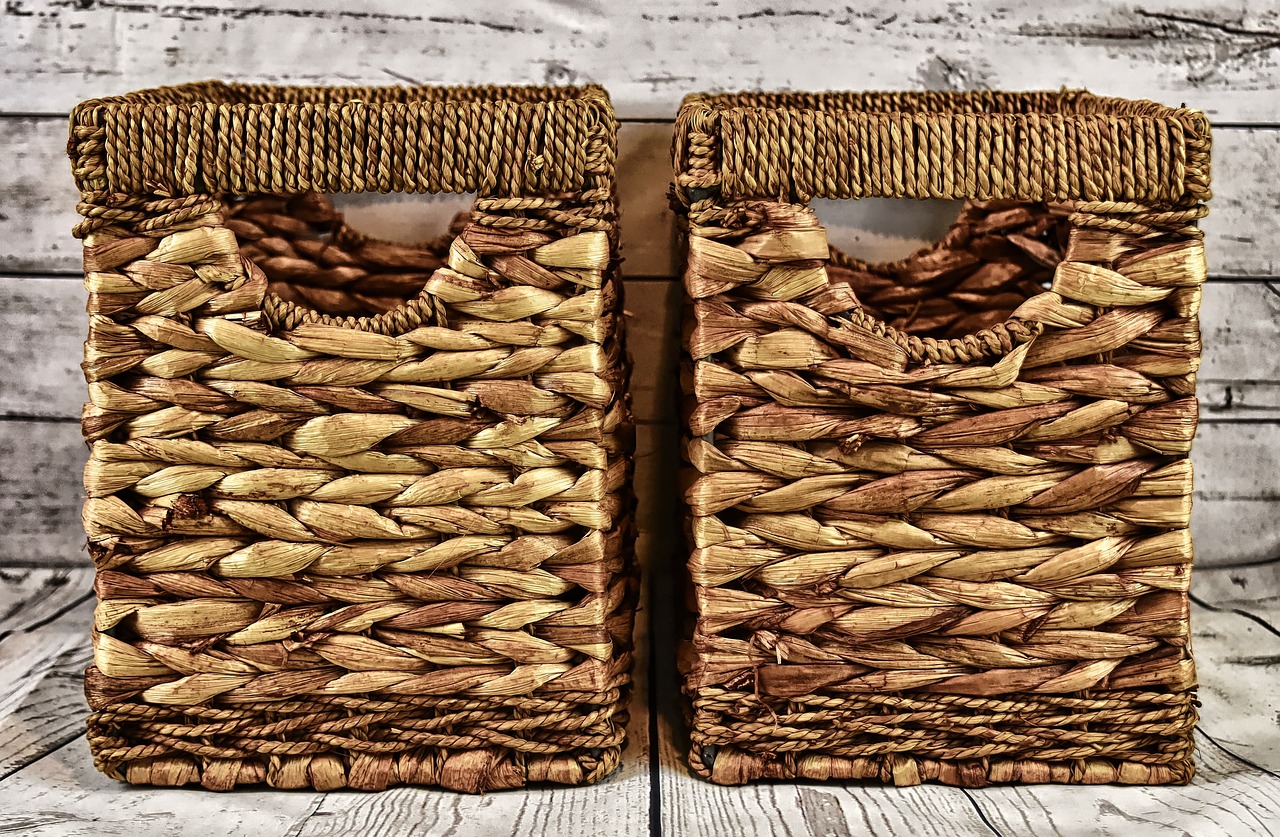
Maximizing storage in your home not only helps keep your space organized but also contributes to a cleaner, more aesthetically pleasing environment. These budget-friendly storage hacks offer both functional and decorative benefits, allowing you to make the most of your living space without breaking the bank.
Open Shelving
Open shelving is a versatile and affordable way to add storage and style to any room. Here’s a comparison of different shelving materials:
| Material | Cost (per linear ft) | Durability | Style |
|---|---|---|---|
| Reclaimed wood | $5 – $20 | High | Rustic, industrial |
| Pine boards | $2 – $5 | Medium | Casual, versatile |
| Metal brackets & wood | $10 – $25 | High | Modern, industrial |
| Floating shelves | $15 – $30 | Medium | Sleek, contemporary |
| Concrete blocks & wood | $1 – $3 | Very high | Industrial, budget |
Installation tips:
- Use a stud finder to ensure secure mounting
- Consider using brackets for added support with heavier items
- Sand and seal wood shelves for a polished look
- Experiment with different stains or paint colors to match your decor
Repurposed Furniture for Storage
Converting old furniture into functional storage solutions is an excellent way to upcycle and add unique pieces to your home. Here’s a guide to turning a dresser into a kitchen island:
Materials needed:
- Old dresser
- Paint or stain
- New hardware (optional)
- Casters
- Countertop material (e.g., butcher block, tile, laminate)
Step-by-step process:
- Remove drawers and sand the dresser
- Paint or stain as desired
- Reinforce the dresser’s structure if needed
- Install casters on the bottom for mobility
- Attach your chosen countertop material
- Add new hardware if desired
- Reinsert drawers for storage
Other repurposing ideas:
- Convert an old ladder into a bookshelf
- Use vintage suitcases as bedside tables
- Transform a wooden crate into a coffee table with storage
Outdoor DIY Projects
Enhancing your outdoor space can significantly increase your home’s livable area and overall value. These budget-friendly outdoor projects allow you to create inviting, functional spaces for relaxation and entertainment without the need for expensive landscaping or construction.
DIY Fire Pit
Building a simple fire pit is an affordable way to create a cozy outdoor gathering spot. Here’s a step-by-step guide:
- Choose a level spot away from structures and overhanging trees
- Mark a circular area (about 3-4 feet in diameter) and remove grass and soil to a depth of 6 inches
- Fill the area with gravel for drainage
- Arrange fire-resistant bricks or stones in a circle, stacking 2-3 layers high
- Fill any gaps between stones with gravel
- Add a layer of sand inside the pit for additional protection
Materials and tools needed:
- Fire-resistant bricks or stones (about 50-80, depending on size)
- Gravel
- Sand
- Shovel
- Tape measure
- Level
- Work gloves
Repurposed Pallet Furniture
Creating outdoor furniture from pallets is an eco-friendly and budget-conscious way to furnish your outdoor space. Here are some pallet furniture ideas:
- Pallet bench: Perfect for seating around the fire pit
- Vertical herb garden: Ideal for small spaces or apartment balconies
- Outdoor coffee table: Add wheels for easy mobility
- Lounger with storage: Great for poolside or patio use
- Sectional sofa: Create modular pieces for flexible seating arrangements
Tips for working with pallets:
- Choose pallets marked “HT” (heat-treated) for outdoor use
- Sand thoroughly to avoid splinters
- Apply outdoor sealant or paint for weather protection
- Use cushions or pillows for added comfort
Conclusion
Implementing these budget-friendly DIY home improvement hacks can significantly transform your living space without straining your finances. From refreshing your walls with bold accent colors to creating custom outdoor furniture, these projects offer a perfect blend of creativity, functionality, and affordability. Start with simple upgrades like installing peel-and-stick backsplash tiles or creating DIY light fixtures, and as you gain confidence, tackle more ambitious projects like building a fire pit or repurposing furniture for storage. Remember, the key to successful DIY home improvement is patience, creativity, and a willingness to learn. By embracing these affordable solutions, you can create a home that reflects your personal style, enhances your daily life, and increases your property’s value—all while staying within your budget. So roll up your sleeves, gather your tools, and embark on your DIY home improvement journey today!